In the last lesson you added the ability to check if a shot made contact with an enemy. In this lesson you will make changes to destroy an enemy with a shot from your ship.
1. Remember from the last lesson that there were 4 steps the code needed in order to shoot and destroy an enemy. One, the ability to find an enemy. Two, to know if the shot hits an enemy. Three, to remove the shot when it hits an enemy. Four, to remove the destroyed enemy from the game screen. You will code this last step with the following changes.
2. Notice that the last two steps handle what to do once the enemy is hit. You already have one of these steps, step 3, in the Shot>>checkContact method. You are about to add another step, step 4. Since both steps handle the same action – what to do when an enemy is hit – you should create a method for this action.
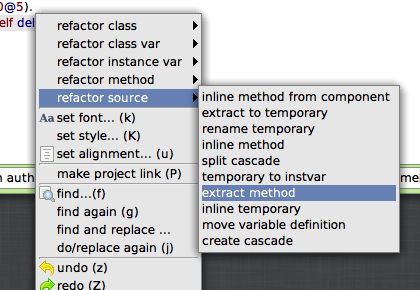
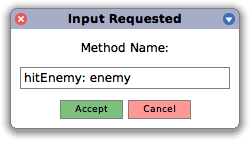
3. For this change, you will once again be refactoring. Start by selecting the highlighted code below in the Shot>>checkContact method. Right click your mouse and you will see a menu similar to Figure 1. Select “refactor source” and then “extract method”. You will then receive a popup box, like Figure 2 below, asking for the method name to create. Enter hitEnemy: enemy for the name and then press enter, or select “Accept”.
checkContact
self top < owner top
ifTrue: [ ^self delete ].
owner enemies
do: [:enemy | (self bounds intersects: enemy bounds)
ifTrue: [self delete]]


4. Look at the code changes that the refactoring made to your Shot>>checkContact and Shot>>hitEnemy: methods. Can you figure out what each line of the new code is doing? You can test the refactoring, however, you will not notice any changes. The code still works the same. Remember, refactoring changes the way a program is written to make it cleaner and easier to understand, without changing how it works or what it does.
5. Now it is time to take care of the enemy that has been taunting you! Make the following code changes to make this happen.
hitEnemy: enemy
self delete.
enemy delete
6. Test out the code changes. What do you notice from the changes that you made?
7. There is now no enemy taunting you. But, surely you want to shoot more! How might you get another enemy on your game screen without restarting your game?
8. A simple way for now will be to add the following code change to ShooterGame>>handleKeystroke: so that you can easily create more enemies on your game screen. A better solution would be to add code to do this automatically, which you will do in a later lesson.
handleKeystroke: anEvent
| keyString |
keyString := anEvent keyString asLowercase.
keyString = 'r' ifTrue: [self initializeEnemies].
ship keystroke: keyString
9. Test out the code change. What do you notice from the change that you made?
10. You might have noticed that you can now create a lot of enemies, and when a shot hits multiple enemies at the same time, one shot can take out more than one enemy. However, one shot should only take out one enemy.
11. Make this final change to Shot>>checkContact. This change will ensure that only one enemy instance is removed per shot. The change uses a method return so that the method stops executing once a shot has destroyed an enemy. Otherwise, the method will continue removing other enemies that were also hit by the same shot.
checkContact
self top < owner top
ifTrue: [^ self delete].
owner enemies
do: [:enemy | (self bounds intersects: enemy bounds)
ifTrue: [self hitEnemy: enemy.
^ self]]
12. What else needs to be done for your shooter game?
13. Save and Quit your Smalltalk image.